


Cleaning your home takes time and energy. It isn't much fun either. Having all of the right supplies on hand is key. Understanding the correct way to clean the different materials throughout your home before you start will simplify the task and will prevent costly mistakes. We've put everything you need to know in one place. Here's the complete guide to cleaning every surface in your home.
COUNTERTOPS
There are many materials used to make countertops. Some of these materials have very specific maintenance requirements to keep them looking good. Make sure you follow the manufacturer's recommendations and these tips to keep your countertops in the best possible shape.
1. Granite
- Make sure that your granite countertops are properly sealed. The right sealant will help to prevent stains or spills from being absorbed into the granite. How do you know if your countertop needs to be resealed? Leave a few drops of water on the surface. If it beads up, your sealant is working. If it soaks in, it's time to reseal your countertop.
- To prevent stains, wipe up spills as soon as you see them. Do not use harsh cleaners or anything with ammonia or bleach on your granite. Use warm water and mild dish soap and wipe down your counters with a soft cloth or sponge.
- Occasionally, you can use a 50:50 mixture of water and 91% isopropyl alcohol in a spray bottle to disinfect your granite. Spray on the mixture, let it sit for a few minutes, rinse it with water and then dry it with a clean cloth.
2. Soapstone
- Since soapstone is nonporous, it is easy to maintain. Soapstone is generally heat and stain resistant and very durable. However, you should use a trivet under hot pots or pans to prevent marring the countertop.
- For daily cleaning, you can use dish soap and water, or you can use an all-purpose cleaner, if you wish.
- Periodically, apply mineral oil to your soapstone countertops to keep them looking great. Rub the mineral oil onto the surface and then wipe away the excess. The mineral oil will help the soapstone to oxidize, or darken, evenly over time.
3. Stainless Steel
- Stainless steel is very heat resistant and durable, but it can begin to look worn if it is not properly maintained. Clean up spills right away to prevent staining and use a cutting board to avoid scratching or etching the surface.
- Clean daily with a sponge that has been dipped in warm water and dish soap. Rinse and dry the countertops after cleaning them.
- You can use a little olive oil or a commercially available stainless steel spray to shine the surface and remove fingerprints.
- For stains, use a mixture of baking soda and water to make a paste. Apply the paste into the stainless steel with a rag, and using a soft bristled brush, rub in the direction of the grain. Rinse with water and dry.
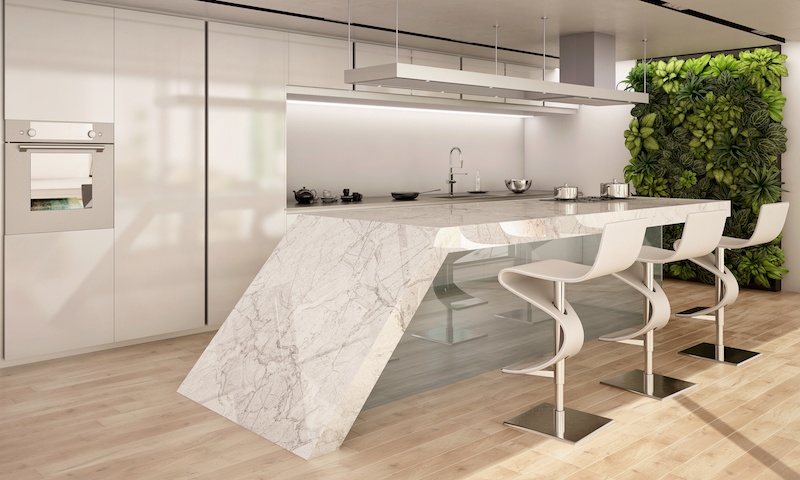
4. Marble
- Marble is a relatively soft and porous surface, and it requires care. Any acids that spill onto marble countertops can quickly etch or stain the surface, so be careful with lemon juice, tomato sauce or alcohols. The same goes for acidic cleansers. Use only mild soap and water for daily cleaning.
- If your countertops do have some stains, they can often be removed with a little ammonia.
- Apply a spray sealant once a month so that stains will not penetrate the marble's surface as easily.
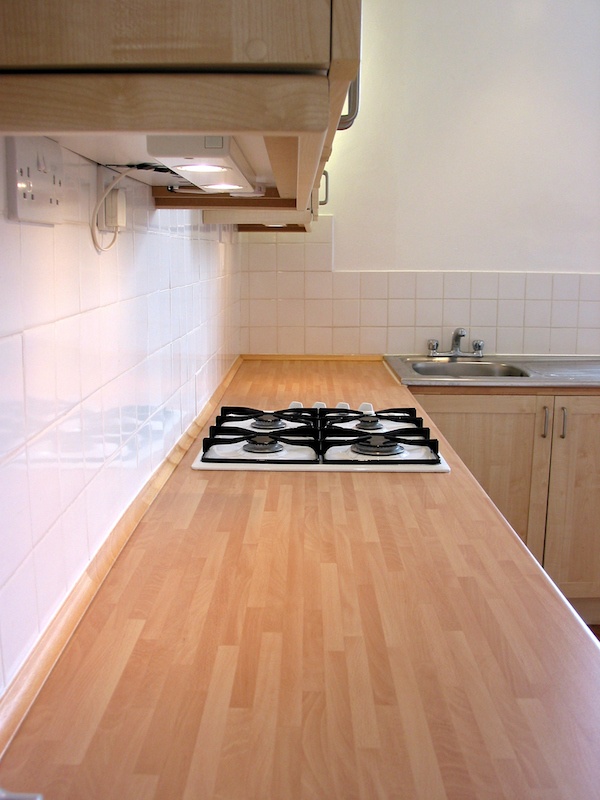
5. Wood
- Wood countertops must be sealed regularly to help them from cracking and absorbing food materials. If your wood countertops become scratched, stained or unsightly, you can lightly sand them and then apply food-safe mineral oil and/or sealant.
- For daily care, make sure to clean spills as soon as they happen to minimize staining. Carefully scrape away food residue with a smooth, plastic putty knife. Then wipe the countertop with dish soap and water. You can use vinegar to clean and disinfect, too.
- Use a paste of baking soda and water or fresh lemon juice to remove stubborn stains.
- Always use a trivet for hot pots and pans to avoid burning your wood countertop.
6. Copper
- Copper countertops are relatively easy to keep clean. Use dish soap and warm water for daily cleaning. Rinse thoroughly with water and dry with a soft cloth.
- For stains or disinfecting, you can use a mixture of lemon juice and salt to make a scrub. Rinse well afterward and dry with a soft cloth.
- Some copper is antimicrobial and that makes it resistant to bacteria. Check to see if your copper countertops have this designation.
- Copper will naturally tarnish over time as it oxidizes and that is the charming appeal of this material. If you prefer to keep the look of shiny copper, you will need to regularly seal the surface.
7. Quartz
- Engineered quartz countertops are very durable and easy to maintain. They can be cleaned with dish soap and water, or a non-abrasive household cleanser. Rinse with clean water and buff with a soft cloth for a lustrous shine.
- If you have food stuck to your quartz countertop, use a plastic putty knife to remove the residue and then clean as described above.
8. Solid Surface
- Solid surface countertops are made from a blend of resin, fillers and pigments. This material is highly durable, generally stain resistant and easy to keep clean.
- For daily cleaning, use soap and water or general purpose cleaner. Buff with a soft cloth to remove water spots.
- Use a paste made from baking soda and water to help remove difficult stains or use a cleaner made specifically for solid surface countertops.
9. Eco-Friendly
- Eco-friendly countertops are made from sustainable or recycled materials such as bamboo, reclaimed wood, glass or composite paper.
- All of these materials need to be cleaned with mild dish soap and water and should be treated with great care to avoid damaging the surface.
10. Concrete
- Concrete must be properly sealed regularly to help to prevent stains and bacteria build-up.
- Never use harsh or abrasive cleansers on concrete countertops. Use only mild soap and water, then rinse with warm water and buff dry with a soft cloth.
- Make sure you use a trivet under hot pots or pans to prevent marking a concrete countertop.
11. Glass
- Glass is very durable and easy to clean. Use a spray cleaner specially formulated for glass to remove dirt, stains and bacteria from your countertops.
- Glass can be scratched or etched fairly easily, so protect your countertops by using a cutting board.
12. Plastic Laminate
- Laminate is an inexpensive material that can absorb stains, so it is best to clean up spills immediately.
- Abrasive cleaners will scratch or discolor the surface of the countertop, so use mild dish soap and water or a mild commercial cleaner.
- Do not use too much water on laminate because it can seep into the seams and cause damage over time.
- A mixture of baking soda and water can help to remove stains, but be careful about scrubbing too hard because that will leave scratches behind.
CABINETRY
Here are simple steps to safely clean the wood cabinetry in your kitchen and bathrooms.
1. Make Your Own Cleaner
- Mix a solution of 50% white vinegar and 50% water in a spray bottle. If you have grease and extra grime to remove from your cabinetry, add a few drops of mild dish soap.
2. Clean and Dry
- Spray the cabinets and let the solution sit for a few minutes. Then, soak a cloth or sponge in clean, warm water and wring out the excess. Wipe the cabinetry to remove any remaining cleaning solution and dry with a soft cloth. Wipe the door handles, hinges and drawer pulls, too. You can use a toothbrush to clean small crevices and cracks, if necessary.
3. Do Not...
- Never use harsh cleaners or scrub brushes on your wood cabinets or you will scratch and damage the surface.

SINKS
It's important to thoroughly clean your kitchen and bathroom sinks regularly to prevent a build-up of bacteria and other germs.
1. Stainless Steel and Porcelain
- Wet the sink and liberally sprinkle baking soda over the entire surface. Rub the baking soda with a sponge until a paste is formed. Use a toothbrush to scrub the cracks around the drain or faucet and to clean rubber gaskets.
- Rinse the sink to remove the baking soda and wipe dry with a soft cloth.
- For extra disinfecting power, use paper towels soaked in white vinegar to wipe the sink after cleaning it. Then rinse off the vinegar and dry the sink with a soft cloth.
2. Natural Stone
- Never use abrasive or acidic cleansers on natural stone. Instead, use mild dish soap and warm water or purchase a cleaner that is made for natural stone.
- After cleaning, use a soft cloth to remove water spots.
3. Cast Iron
- Use mild, non-abrasive cleansers on cast iron to avoid scratching and pitting the surface. Mild dish soap and water on a sponge works best.
- A paste of baking soda and water can remove stubborn stains.
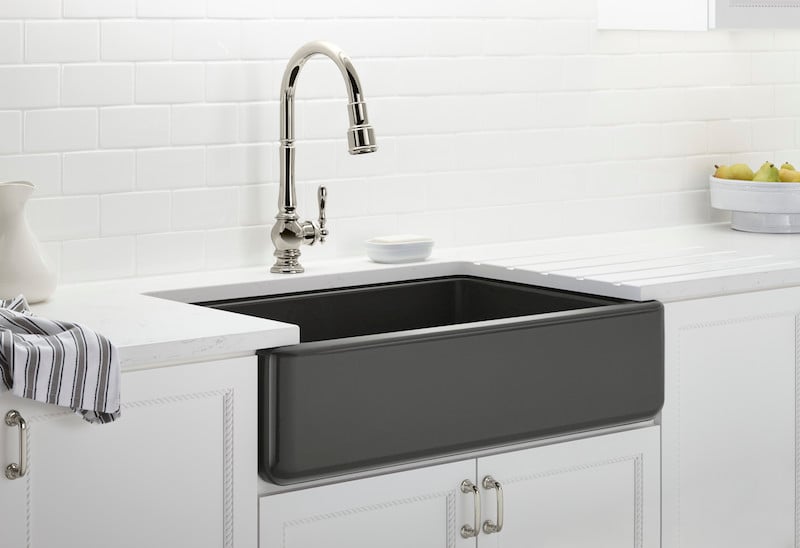
Photo courtesy of Ferguson Bath, Kitchen & Lighting
4. Fireclay
- For daily cleaning, use dish soap and water or a mild abrasive, then rinse.
- Use a mixture of baking soda and water to remove stains.
- Wipe the sink with a soft cloth to prevent water spots.
- Apply a thin layer of liquid wax to the sink basin periodically so that water flows down the drain and does not pool at the bottom of the sink.
5. Copper
- Like copper countertops, copper sinks will develop a natural patina over time. If you do not clean off food residue, toothpaste or other substances from your copper sink, they can leave a mark.
- For daily cleaning, use dish soap and warm water. Rinse thoroughly and dry with a soft cloth.
- For stains or disinfecting, you can use a mixture of lemon juice and salt to make a gentle scrub. Rinse well afterward and dry with a soft cloth. Do not use harsh or abrasive cleansers that can scratch the surface.
- Do not allow drain cleaner or products with bleach to come into contact with copper.
- Do not leave rubber mats or sponges sitting in a copper sink. They can trap water and that will leave marks.
6. Composites or Solid Surface
- Use a non-abrasive, non-acidic cleanser such as mild dish soap to avoid scratching and stripping the finish from composite or solid surface sinks.
- Rinse the sink and dry it off after each use to prevent water marks.
- A mixture of baking soda and water can remove stains.
7. Concrete
- Since concrete is porous, use a sealant regularly to assist in preventing stains and scratches.
- Use only mild, non-abrasive cleansers to avoid removing the sealant.
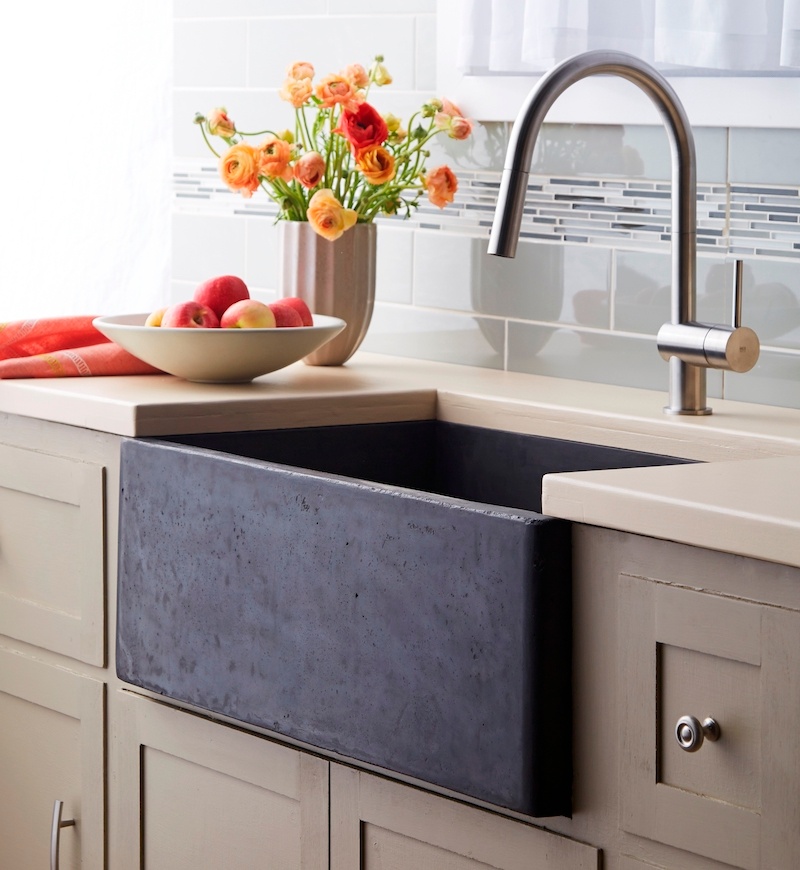
Photo Courtesy of Ferguson Bath, Kitchen & Lighting
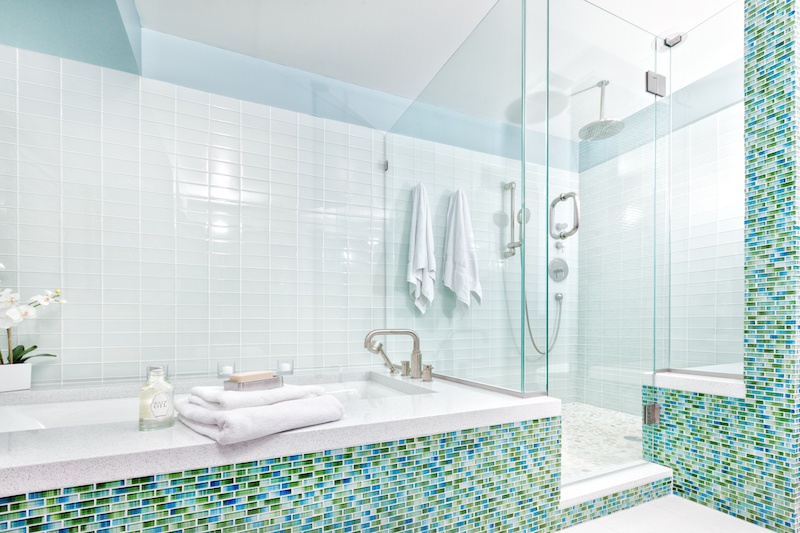
TILE
Tile is durable and fairly easy to clean, but it can begin to look dingy over time. Here are some simple ways to keep your tile floors, walls or countertops looking good.
1. Vacuum, Sweep or Wipe Often
- Vacuum, sweep or wipe your tile regularly to remove debris. Make sure you are using the proper attachment or brush on your vacuum so that the tile does not get scratched.
2. Make Your Own Cleaner
- Clean your tile with a mild soap and water or a mixture of vinegar and water. Use a rag or chamois mop instead of a sponge to avoid pushing the dirt around instead of removing it. Change the dirty solution frequently while cleaning so that you will not leave a residue behind.
3. Every Once In A While, Switch It Up
- Periodically, switch to an all-purpose commercial cleaner that will remove residue or stains. Rinse the tile with hot, clean water and use a cloth to dry and remove water spots.
4. Clean The Grout
- Keeping your grout clean will keep your tile looking fresh. Grout will absorb dirt and can stain easily.
- Prepare your own solution of water and bleach and put it in an empty spray bottle, or purchase a cleaner that is made specifically for grout. Follow the directions on the container or apply the homemade solution and let it sit for up to 10 minutes. Rinse and dry the grout.
- If the grout is still stained, try making a paste of baking soda and water and apply it to your grout. Let it sit overnight and then scrub it clean with a toothbrush the next morning. Then, rinse the paste off and dry the grout with a cloth.
- Applying a sealant to your newly cleaned and dried grout can help it to stay looking great over time.
BATHTUBS AND SHOWERS
Regular cleaning of your bathtub and shower will prevent build-up of mildew and soap scum. Read on to see more tips about cleaning your bathroom.
1. Remove Soap Scum
- Remove soap scum and personal care product residue from bathtubs and showers by using a commercial cleaner or a mixture of white vinegar and water. Rinse thoroughly and wipe the surface dry.
2. Clean The Shower Door
- Use a spray glass cleaner to clean the shower door, inside and out.
3. Use A Squeegee
- After cleaning your shower doors and walls, use a squeegee to remove water spots.
4. Keep The Shower Curtain and Liner Clean
- Pull the shower curtain closed after each use to prevent mold and mildew from collecting in the wet folds. Wash shower curtains and liners in your washing machine once a month and then hang them back up to dry.
5. Prevent Clogs
- Periodically, pour 1/2 cup of white vinegar mixed with 1/2 cup of baking soda down the drains of your bathtubs and showers to help prevent clogs. Let the mixture sit for a few minutes and then follow with boiling water to assist in the removal of built-up materials.

TOILETS
Cleaning a toilet is probably the last thing you want to do, but it's important for the health of your family to do it the right way.
1. Disinfect The Inside
- Flush the toilet with the lid down to prevent germs from splattering all over your bathroom. Open the lid and add a toilet bowl cleaner (powder, liquid or gel) as close to the rim as possible. Let it sit for several minutes while you move on to the outside of the toilet.
2. Clean The Outside
- Clean the outside of the toilet using an all-purpose spray cleaner. Start at the top, and work your way down until the entire outside of the toilet is coated. Wipe down all surfaces with paper towels since they are disposable.
3. Make Sure You've Cleaned It All
- Don't forget to clean both sides of the toilet seat, the hinges and flushing handle.
4. Finish The Inside
- Now it's time to finish cleaning the inside of the toilet. Use a toilet brush and start scrubbing under the rim first. Work your way down until you have scrubbed the entire toilet bowl. Flush the toilet with the lid down to rinse the cleanser away. Store your toilet brush in a dedicated holder where it can dry out.

WINDOWS AND GLASS DOORS
The sunshine pouring into your home is revealing that your windows and glass doors are really dirty. What's the easiest way to clean them? Follow these steps to have sparkling, streak free windows and glass doors.
1. How Do Your Windows Work?
- Check to see how your windows work before you start cleaning. If you have newer windows in your home, you should be able to tilt them inward so that you can clean them without going outside. If you have older style windows, you will need to tackle the job from the inside and outside. Glass doors will need to be cleaned on both sides.
2. Prep The Area
- Prep the area you want to clean by protecting the floor with a drop cloth and tying back drapes or other window coverings.
3. Make Your Own Cleaner
- You don't need to use expensive spray bottles of glass cleaner. An economical and easy solution is to use warm water, a little dish soap and a clean, new sponge. Add some vinegar or ammonia if your windows or glass doors are super dirty. You can also fill an empty spray bottle with the solution if that is easier for you.
4. Start Cleaning
- Wash or spray the windows or glass doors from the outside corners and move inward.
5. Wipe It Dry
- Wipe the glass dry in one single stroke with a lint-free, soft cloth or squeegee.
6. Clean The Tracks and Windowsills
- Vacuum the tracks and windowsills, and use a small brush to loosen any remaining debris. Use a sponge and an all-purpose cleaner to remove the rest of the dirt or grime.
7. Cleaning The Outside
- If you are cleaning windows or doors outside, you can rinse them with a hose before drying them with a squeegee or cloth.
- Don't forget to clean and rinse the screens or storm windows and make sure they are fully dry before reinstalling them.
- If you will need to climb up tall ladders to clean windows that are very high inside or outside, consider hiring a professional window cleaning company. Just make sure that the company you hire is reputable, has insurance and will provide you with a cost estimate before they start any work.

Looking for more information on windows and doors? Click here to get our eBook on windows and doors.
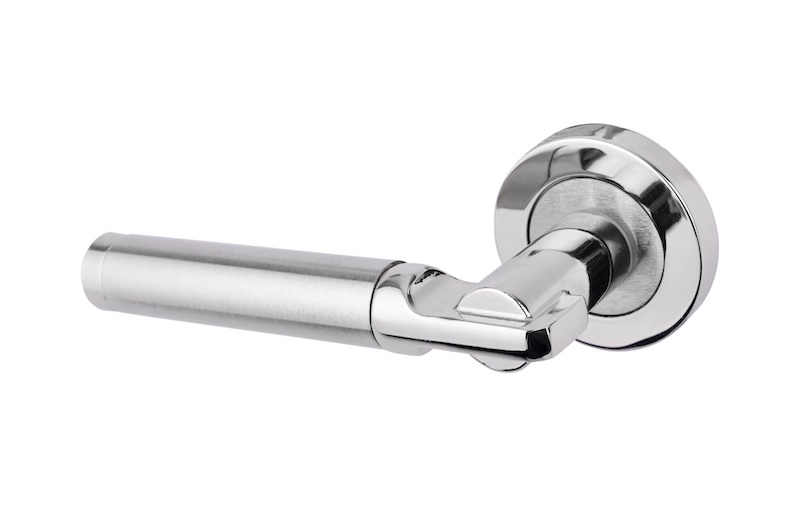
DOOR KNOBS AND HANDLES
Cleaning your door knobs, door handles or drawer pulls throughout your home may not be top of mind, but with so many hands touching them every day, bacteria and germs can build up on those surfaces. And, having cleaned and polished knobs, handles and pulls makes your home have an extra sparkle.
1. Brass
- Brass can become tarnished and dull over time. To keep it shiny visit a hardware store and purchase a product specifically designed to clean and shine brass. Pour the cleaner onto a damp sponge and rub it onto the knob, handle or pull. Let it dry and then wipe it off with a soft cloth.
2. Chrome and Nickel
- Clean polished or satin chrome or nickel with dish soap and water. Dampen a sponge and gently rub the knob, handle or pull. Use clean water to rinse off the soap and then polish with a soft cloth.
- If soap and water isn't doing the trick, try using white vinegar and water.
- To add extra shine to your polished chrome or nickel handles, knobs or pulls, use a commercially available product specifically designed for this purpose.
- Never use an abrasive cleaner or scrub brush on chrome or nickel. You can scratch the material or remove the finish.
3. Bronze or Copper
- Bronze and copper will develop a patina over time. If you want to keep your bronze or copper door hardware shiny, you will need to clean it regularly.
- You can purchase a commercial cleaner at your local hardware store and follow the directions to keep your door hardware looking great.
- Or, you can use a homemade paste made from lemon juice and baking soda. Apply the paste to the bronze or copper surface and rub it in with a soft cloth. Leave the paste sit for 30 minutes. Rinse off the paste, dry the handle or knob completely and buff with a soft cloth.
4. Crystal
- Crystal door handles, knobs and pulls can be easily cleaned with a regular spray glass cleaner or with a solution of white vinegar and water.
5. Hand-Painted
- Be very careful when cleaning hand-painted door hardware. Use a solution of mild dish soap and water. Apply it with a cloth or clean sponge. Rinse well with clean water and dry with a soft cloth.

HARDWOOD FLOORS
How do you keep your hardwood floors gleaming? Here are some tips.
1. What Kind Of Hardwood Is It?
- Before you start, determine what type of finish is on your hardwood floors. Most sand-in-place hardwood flooring is sealed with polyurethane which is water and stain-resistant. A similar type of sealant is applied to pre-finished hardwood flooring during the manufacturing process. Either type of hardwood flooring can be damp-mopped.
- Take note - unfinished, oil finished or waxed hardwood floors should not be damp-mopped, but should be vacuumed and waxed periodically.
2. Vacuum or Dust
- Vacuum or use a dust mop to remove all dirt and debris regularly. Be sure that the vacuum you use has an attachment that will not scratch or damage your hardwood flooring.
3. Mix Up The Cleaning Solution
- Use a cleaning agent that is made specifically for sealed or pre-finished hardwood floors. Follow the directions and add it to water in a large bucket. Or, you can mix 1 part vinegar to 10 parts warm water, if you wish.
4. Damp Mop
- Wet your mop and then squeeze out the excess water so that the mop is only damp. Using a very wet mop can damage your floors. Mop in the direction of the wood grain.
5. Rinse Off The Cleaner
- Rinse your mop in clean water, wring out the excess and go over the hardwood again to remove the cleaner and any remaining dirt.
6. Buff To A Shine
- To get your floors to shine, buff them with a soft, lint-free cloth or dry mop after cleaning them.

CARPET
Carpet is a staple in most homes because it is available in a wide range of colors, textures and styles. How do you keep your carpeting looking good, even in high-traffic areas? Here are some tips.
1. Vacuum Regularly
- Regularly vacuum your carpet to remove dirt and debris.
2. How To Correctly Remove A Stain
- If you have a stain, dab it and don't rub it to get most of it out of the carpet.
- Then, make a solution of 1 part vinegar to 1 part water and put it into a spray bottle. Spray the mixture on the stain and dab using a clean cloth or sponge, moving from the outside inward.
- Clean your cloth or sponge often and keep blotting until the stain is gone. Then rinse with warm water. Use paper towels to absorb the excess water from the carpet.
3. Removing Sticky Stuff
- If gum or another sticky substance gets stuck in your carpet, use an ice cube to freeze it for about one minute. Once the sticky stuff is frozen, use a spoon to lift it up and carefully trim the carpet fibers as close to the substance as possible. If you are very careful, the trimmed carpet fibers should not be visible.
4. Dealing With Pet Accidents
- Pet accidents can stain your carpet and leave a lingering odor. If your pet has an accident, soak it up with paper towels. Then, spray on a mixture of vinegar, water and baking soda and let that sit for up to 10 minutes. Use a soft cloth with clean water to remove the mixture and then blot with another cloth.
5. Steam Cleaning
- To keep your carpet looking fresh and new, use a steam cleaner periodically. You can rent or purchase a machine that uses a solution mixed with water to clean the carpet down to the padding.
- Hiring a carpet cleaning company is an easier way to go, but make sure they are reputable and licensed.

PAINTED WALLS AND TRIM
It's important to use the right cleaning solution on different types of paint. Need to know how to clean smudges or stains from your walls or trim? It's easier than you may think.
1. Latex Paint
- First, cover your floor with a drop cloth.
- Fill a bucket with water and several drops of mild dish soap. If you have stubborn stains on your latex paint, you can add 3 tablespoons of vinegar.
- Wet a clean sponge in the bucket, and wring it out well. Using a soaking wet sponge will leave drip marks on your walls or give you a shock when you are wiping around electrical outlets.
- Wipe your walls or trim, rinse the sponge and repeat as necessary.
- Do not use an abrasive cleanser because it can remove latex paint.
2. Oil-Based Paint
- Oil-based paint is more durable than latex paint. To remove stains or marks on oil-based paint, you can follow the same steps you would use for latex paint, but if you have difficult stains or grease, you can use a mild degreaser in addition to the soap and water or vinegar and water solution.
- Never use a scrub brush or an abrasive cleanser on oil-based paint or you could streak or damage the walls or trim.